Contents
Plastering is a crucial step in ensuring the durability and aesthetics of brick walls.
There are various methods to choose from, including traditional, machine, and spray plastering.
We will explore the different types of plastering, the necessary materials, the process of plastering on a brick wall, and how to maintain and repair the plaster.
Let’s learn all about the art of plastering on brick walls!
What Is Plastering?
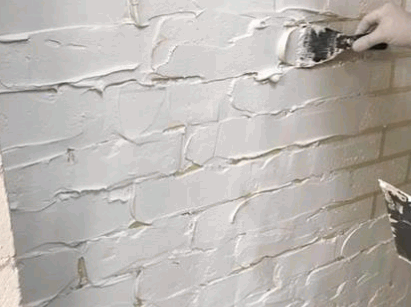
Plastering is a crucial step in the renovation process where a skilled plasterer applies a smooth, durable finish to interior walls.
A professional plasterer plays a vital role in enhancing the aesthetics and longevity of a building by expertly applying plaster and ensuring a seamless finish. They meticulously prepare surfaces, apply the plaster mix evenly, and meticulously smooth out imperfections to achieve a flawless look. Expertise in various plastering techniques, such as skimming, floating, and rendering, is crucial to cater to different surface requirements.
A skilled plasterer possesses an eye for detail and precision, ensuring that the final finish is both visually appealing and structurally sound. Their expertise goes beyond the mere application, as they also understand the properties of different plaster materials and how they interact with various surfaces.
Uncover more: How To Plaster DIY
Why Is Plastering Necessary?
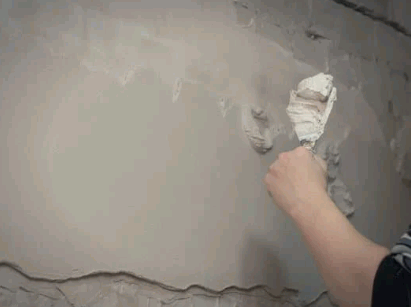
Plastering is essential in both new builds and renovation projects to provide a protective and aesthetic coating over surfaces like plasterboard or brickwork.
Applying plaster not only enhances the structural integrity of walls by adding a protective layer that can withstand wear and tear but also contributes significantly to the overall appearance of a room. Techniques like skim coating are instrumental in achieving a smooth, flawless finish, covering imperfections, and creating a clean canvas for paint or wallpaper. Beyond functionality, plastering allows for customisation through various textures and designs, adding depth and character to walls.
What Are The Benefits Of Plastering?
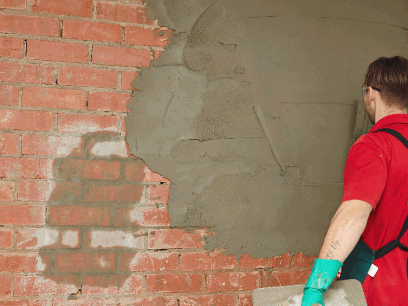
The benefits of plastering walls extend beyond aesthetics, offering advantages such as soundproofing, improved thermal insulation, and the use of materials like gypsum for a durable finish.
Soundproofing is a crucial aspect where plastering plays a significant role. By adding an extra layer of material to the walls, plaster helps reduce noise transmission, creating a more peaceful and quiet indoor environment.
In terms of DIY applications, plastering is a versatile skill that homeowners can learn and apply themselves. With the right tools and materials, individuals can achieve professional-looking results while saving on labour costs.
Using specific materials like gypsum in plastering not only ensures a durable finish but also contributes to better indoor air quality. Gypsum is known for its fire-resistant properties and mould resistance, making it a safe and reliable choice for wall finishes.
What Are The Types Of Plastering?
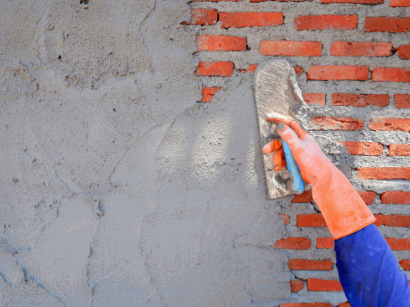
There are different types of plastering techniques used in renovation projects, including traditional plastering, machine plastering, and spray plastering, each offering unique benefits and applications.
Traditional plastering, often referred to as wet plastering, involves the manual application of plaster to walls or ceilings. It is a time-tested method known for its durability and ability to create a smooth finish.
On the other hand, machine plastering utilises mechanical tools to apply plaster quickly and efficiently, making it suitable for large-scale projects.
Spray plastering, as the name suggests, involves spraying a mix of plaster and water onto surfaces, providing fast and uniform coverage. Each of these methods has its own advantages depending on the specific requirements of the renovation project.
Traditional Plastering
Traditional plastering involves the manual application of plaster mixes such as sand and cement render, often reinforced with bonding agents like Thistle Bond to enhance adhesion and durability.
In the process of traditional plastering, skilled artisans meticulously apply the plaster mix onto walls and ceilings, using specialised tools like trowels and floats to achieve a smooth finish. The bonding agents play a crucial role in ensuring a strong bond between the plaster and the substrate, preventing cracking and improving longevity.
Before applying the plaster mix, the surface is prepared by cleaning and dampening it to promote better adhesion. The mix is then spread evenly and compacted to eliminate air pockets, creating a solid and uniform surface.
Machine Plastering
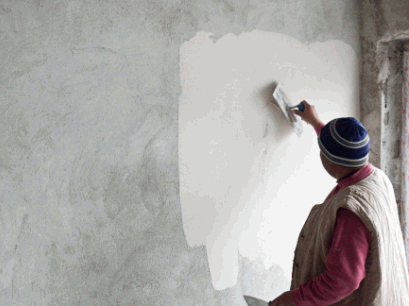
Machine plastering utilises specialised equipment to apply plaster quickly and efficiently, with products like Blue Grit ensuring a strong bond between the plaster and the substrate.
Blue Grit, a bonding agent commonly used in machine plastering, plays a crucial role in enhancing the adhesion of plaster to various surfaces. The process starts with preparing the surface and eliminating any dust or debris that could affect adhesion. Once the surface is prepped, the plaster is mixed to the desired consistency and fed into the plastering machine.
This machine then pumps the plaster onto the surface, spreading it evenly and quickly. The use of specialised equipment not only speeds up the plastering process but also ensures a more consistent and uniform finish.
Spray Plastering
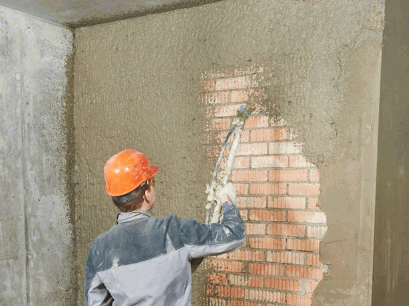
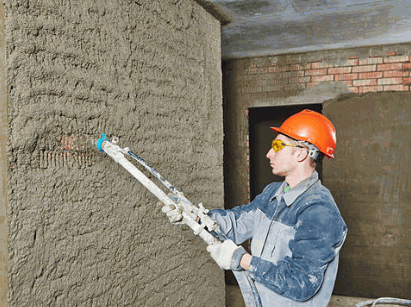
Spray plastering involves the use of a PVA solution and products like British Gypsum to create a fine mist of plaster that is sprayed onto walls, offering a quick and smooth finish.
This technique is highly favoured for its efficiency and time-saving properties. By utilising specialised pumps, the plaster mixture is evenly distributed across the surface, resulting in a seamless coat. The application is not only quick but also ensures a consistent thickness throughout, eliminating the need for manual leveling. The use of PVA solutions plays a crucial role in enhancing the adhesion of the plaster to the substrate, promoting a durable and long-lasting finish.
What Materials Are Needed For Plastering On Brick Wall?
Plastering a brick wall requires essential materials such as plastering sand for the mix, safety equipment like gloves and glasses, and tools such as a margin trowel for application.
To effectively plaster a brick wall, you will need a hawk to hold the plaster mix, a plastering float for spreading the plaster smoothly, and a water sprayer to keep the surface damp for better adhesion.
Don’t forget to have a bucket for mixing the plaster, a spirit level to ensure a flat finish, and a sponge for cleaning up any excess plaster. A brush can be handy for finishing touches and clean-up after the plastering process.
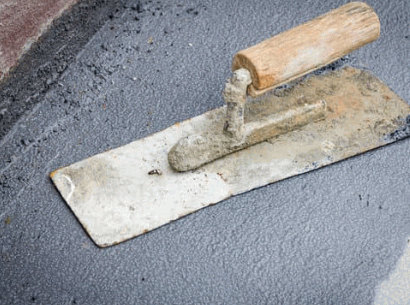
Plastering Trowel
A plastering trowel is a crucial tool for spreading and leveling plaster mixes on surfaces, along with other mixing equipment like buckets for preparation.
When applied skilfully, a plastering trowel ensures that the plaster mixture adheres evenly and smoothly to the surface, creating a perfect base for further finishing touches. A seasoned plasterer uses the trowel to achieve a seamless and flawless finish, eliminating any imperfections or air bubbles that may appear during the application process.
The design of the trowel allows for easy manoeuvrability, aiding in the precise application of the plaster mix on corners and edges. By adeptly controlling the pressure and angle of the trowel, one can achieve a uniform thickness of plaster across the entire surface.
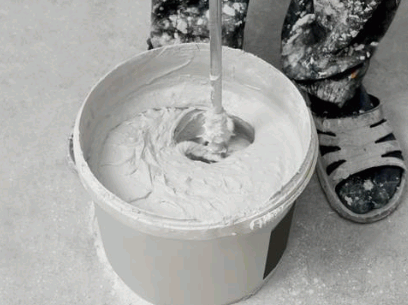
Bucket
A bucket is essential for mixing plaster materials with water to achieve the right consistency before application, ensuring a smooth and workable plaster mixture.
By using a bucket, you can carefully control the amount of water added to the mix, preventing the plaster from becoming too thin or too thick. Maintaining the correct water-to-material ratio is crucial for achieving the desired strength and adhesion of the plaster once it has been set. Using a bucket helps minimising waste and mess during the mixing process, allowing for a more efficient and cleaner work environment.
Water
Water is a vital component in the plastering process, used to activate cement render mixes and achieve the right consistency for applying plaster on surfaces like brick walls.
When water is combined with the dry mix of cement and sand, a chemical reaction occurs, binding the particles together and forming a workable paste. This paste not only helps the plaster adhere securely to the substrate but also allows for proper workability during application. The amount of water added is crucial as it directly affects the setting time, strength, and durability of the plaster finish.

Plastering Sand
Plastering sand is a key ingredient in creating plaster mixes, especially when combined with products like the Gyproc Drywall Sealer to enhance the bond and finish of the plaster.
One of the primary functions of plastering sand is to provide a stable base for the plaster mix, ensuring proper adhesion to the surface. When mixed with additives such as Gyproc Drywall Sealer, the sand not only improves the workability of the mix but also helps in achieving a smoother finish. The fine particles of plastering sand aid in filling gaps and voids, thus increasing the overall strength and durability of the plaster. This compatibility with additives like the Gyproc Drywall Sealer further enhances the performance and longevity of the plastered surface.
Plastering Cement
Rendering cement is a versatile material used in DIY projects and renovation works to create a strong and smooth finish on various surfaces like brick walls.
One of the key benefits of using rendering cement is its ability to easily adhere to different types of surfaces, providing a durable and long-lasting finish. Rendering cement can be moulded and shaped to fit intricate designs or create decorative elements, making it a versatile choice for enhancing the aesthetic appeal of a space.
Whether you are patching up cracks and holes or completely resurfacing a wall, rendering cement offers a cost-effective solution for achieving a professional look without the need for specialised skills.
Mixing Equipment
Mixing equipment such as respiratory masks is essential during the preparation of plaster mixes, particularly with cement renders that may emit fine particles.
Proper mixing equipment is crucial for ensuring the safety of individuals involved in construction projects where dust and particles can pose health risks.
The use of respiratory masks helps to protect the respiratory system from inhaling harmful substances that are released during the mixing process. Along with respiratory masks, other essential equipment includes goggles to safeguard the eyes from irritation caused by airborne particles.
By investing in quality mixing equipment, construction workers can perform their tasks efficiently while prioritising their health and well-being.
How To Prepare The Brick Wall For Plastering?
Preparing a brick wall for plastering involves cleaning the surface, wetting it adequately, and applying a bonding agent like Thistle Bond for better adhesion, especially in heritage settings like a Victorian terrace.
The surface of the brick wall needs to be thoroughly cleaned to remove any dirt, dust, or debris that could hinder the bonding process. This is crucial for ensuring a smooth and even finish once the plaster is applied. It is important to control the moisture levels in the bricks by wetting them adequately before applying the bonding agent. This helps prevent the bricks from absorbing moisture from the plaster too quickly, which can lead to cracking or poor adhesion.
The application of a bonding agent such as Thistle Bond is essential, especially in environments like Victorian terraces where the walls may be old or uneven. The bonding agent helps the plaster adhere firmly to the surface, creating a strong and durable finish that can withstand the test of time.
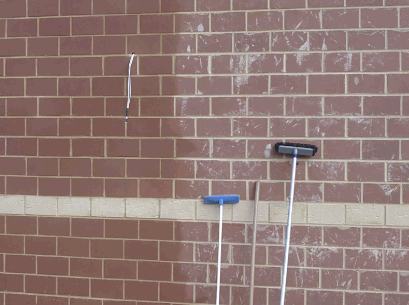
Clean The Wall
Cleaning the brick wall is essential before plastering, involving tasks like sanding to remove imperfections or old paint that may affect the adhesion of the plaster.
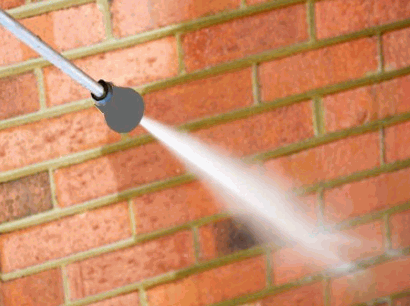
Another crucial step in preparing the surface is to thoroughly clean the wall to eliminate any dust, dirt, or grease that could compromise the bond between the plaster and the bricks. This can be achieved by scrubbing the wall with a mixture of water and mild detergent, ensuring all areas are free from contaminants. Any loose mortar should be carefully removed to create a smooth and even surface for the plaster to adhere to.
Inspecting the wall for cracks or damage is also imperative before proceeding with the plastering process. Any structural issues should be addressed and repaired to prevent future problems with the plaster finish. To further enhance the cleanliness of the brick surface, using a pressure washer can help remove stubborn stains or residues that may be present. By diligently preparing the brick wall in this manner, you can ensure a durable and flawless plaster application that will stand the test of time.
Wet The Wall
Wetting the brick wall before plastering helps control its absorbency and improves the bond with materials like cement render by applying a PVA solution to seal the surface.
By wetting the brick wall, you create a damp barrier that prevents the rapid absorption of the plaster, allowing it to cure properly. This step not only enhances the adhesion of the plaster but also prevents it from drying out too quickly, which can lead to cracks and a weaker finish.
Using a PVA solution further reinforces this adhesion by forming a protective layer that promotes better cohesion between the wall and the plaster. This solution acts as a primer, ensuring that the plaster adheres securely to the wall without being absorbed too quickly.
Apply Bonding Agent
Applying a bonding agent on the brick wall requires safety precautions like wearing gloves and glasses to protect against chemical exposure whilst ensuring a secure bond for the plaster.
Before starting the application, make sure to clean the surface thoroughly to remove any dust or debris that could hinder adhesion. The bonding agent acts as a bridge between the existing substrate and the fresh plaster, promoting better bonding and reducing the risk of delamination over time.
Proper application techniques are essential to ensure uniform coverage and maximum effectiveness. Using a brush or roller, apply the bonding agent evenly across the surface, making sure to follow the manufacturer’s instructions for drying times and curing processes. This meticulous approach sets the foundation for a long-lasting and durable plaster finish.
What Is The Process Of Plastering On Brick Wall?
Rendering a brick wall involves a systematic process that includes mixing the plaster, applying the first coat, followed by subsequent coats, and finally smoothing and finishing the surface to achieve a polished look.
First and foremost, the key to a successful rendering project is to prepare the plaster mix using the right proportion of plaster and water to ensure a smooth consistency that is easy to work with. Once the mix is ready, start by applying the first coat of plaster evenly across the wall using a trowel. Allow it to set before applying subsequent coats, building up the thickness gradually. After the final coat, focus on smoothing out any imperfections and achieving a uniform surface texture. To finish off, use a trowel or float to create a sleek, polished look that enhances the overall appearance of the brick wall.
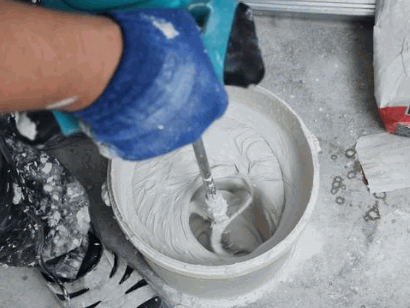
Mixing The Plaster
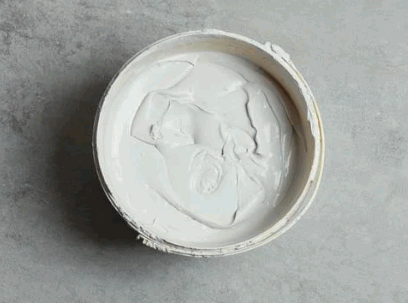
Mixing the plaster for a brick wall involves combining plaster, water, and additives like cement render to achieve the desired consistency and bonding strength for application.
It is crucial to maintain the correct ratios of each ingredient to ensure that the plaster sets properly and provides durable support to the brickwork. Cement render acts as a stabilizer, enhancing the adhesion of the plaster to the bricks and preventing it from cracking or peeling off over time.
Additives such as lime can improve the workability of the mixture, making it easier to apply smoothly onto the walls. Properly mixing these components in a clean and appropriately sized container is essential to avoid any lumps or inconsistencies in the plaster.
Applying The First Coat
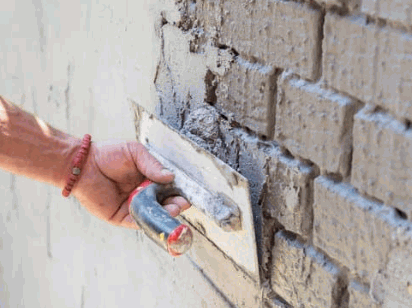
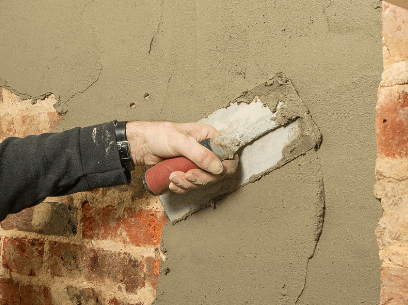
The first coat of plaster on a brick wall is crucial, requiring skilled application techniques by a plasterer while using safety gear like gloves to ensure a smooth and even base layer.
Before starting the application process, the plasterer must thoroughly prepare the surface by ensuring it is clean and free of debris. Next, a mix of plaster and water is carefully blended to create the right consistency for optimal adhesion. The skilled professional then expertly applies the plaster onto the wall using a hawk and trowel, using precise movements to achieve uniform coverage.
Protective gear, including gloves and goggles, is essential to prevent skin irritation and exposure to dust particles. This not only ensures the safety of the plasterer but also contributes to the quality of the finished surface. With attention to detail and craftsmanship, the first coat of plaster sets the foundation for a durable and visually appealing wall finish.
Applying The Second Coat
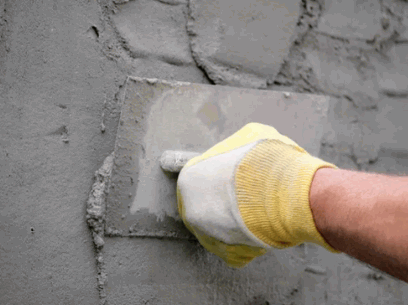
The second coat of plaster on a brick wall involves applying a skim coat or refining the surface with cement renders to achieve a uniform and polished finish for subsequent smoothing.
Skim coating is a popular technique that involves applying a thin layer of plaster or joint compound to the surface of the wall. This method helps to fill in any imperfections or uneven areas left after the first coat. By using a trowel or a drywall knife, the skim coat is spread evenly, providing a smooth and consistent texture.
On the other hand, cement renders offer a more robust solution by using a mixture of cement, sand, and water. This mixture is applied to the wall in layers, allowing for greater control over the final thickness and texture. Cement renders are ideal for achieving a durable and long-lasting finish on exterior walls.
Smoothing And Finishing The Plaster
The final stage of plastering a brick wall involves smoothing the surface with tools like trowels and applying finishing touches such as paint or sealants to enhance durability and aesthetics, with products like Thistle Bond providing additional reinforcement.
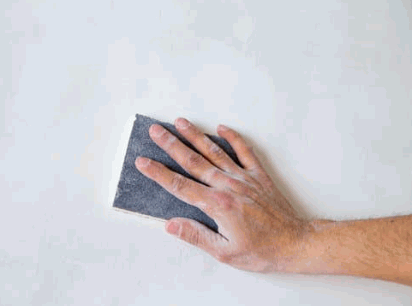
When smoothing the plaster, it is essential to achieve a uniform and level finish by carefully working in small sections at a time. The trowel should be held at a consistent angle to avoid creating uneven patches or lines.
- Once the plaster is evenly spread, a sponge or damp cloth can be used to refine the surface further, removing any imperfections or excess material for a flawless result.
- After allowing the plaster to fully dry and cure, applying a sealant or bonding agent is crucial to protect the surface from moisture and potential damage. This step not only enhances the longevity of the plaster but also strengthens its adhesion to the brick wall, ensuring a professional and long-lasting finish.
How To Maintain And Repair Plaster On Brick Wall?
Maintaining and repairing plaster on a brick wall involves inspecting for damages, patching cracks, and applying fresh coats of plaster as part of regular upkeep and renovation efforts.
Before starting any repair work, it’s crucial to thoroughly examine the entire surface for signs of damage such as hairline cracks, water stains, or areas where the plaster is peeling off.
Once identified, utilise a chisel or scraper to gently remove loose or damaged plaster to create a smooth base for repairs.
Using a suitable plaster mix, carefully fill in the cracks, making sure to blend the new layer seamlessly with the existing surface.
In cases of extensive damage, consider applying a bonding agent before reapplying plaster to ensure a strong and lasting repair.
