Contents
DIY chemical injection dampproofing is a method to stop moisture from entering dwellings. It involves injecting a special chemical blend into walls, forming a barrier against water. Homeowners can do this themselves, thus avoiding the cost of hiring professionals.
- Step one is locating spots that are prone to moisture. Signs are damp patches, peeling wallpaper, and musty smells. Then, clean and remove any loose material from these areas.
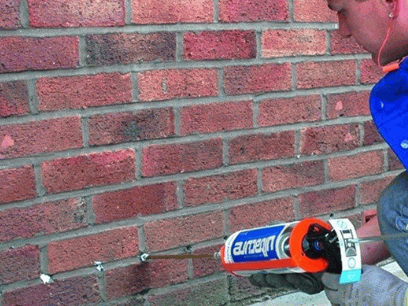
- Next, drill holes in the affected walls at regular intervals. This allows the chemical solution to reach deep into the masonry. The mix is usually water with a damp-proofing agent.
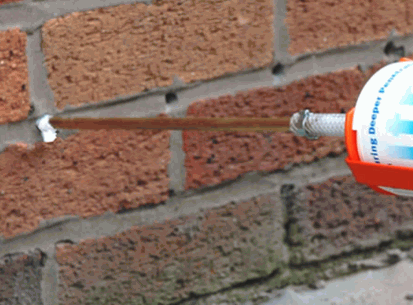
- Using an injection gun, inject the blend into each hole until it starts to overflow slightly. This ensures that all empty spaces within the wall are filled with the solution. Wipe away the extra.
- Be safe during this process, as some damp-proofing agents can be hazardous if not handled correctly. Wear protective gear such as gloves and goggles, and make sure the work area is well-ventilated.
Explore further: How To Damp Proof A Retaining Garden Wall
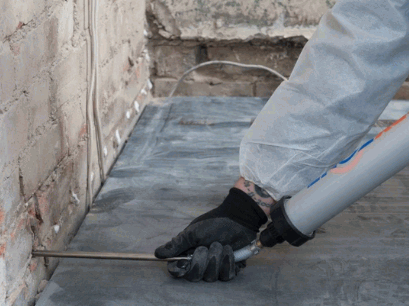
Understanding The Need For Damp Proofing
Damproofing is essential to protect buildings from moisture damage. It halts water infiltration, mold growth, and structural breakdown. Knowing about damp proofing assures long-term, sustainable structures.
Moisture can cause severe issues such as decay, fracturing, and even weakening of the structure. Dampproofing is the first defense against these problems. It establishes a barrier that stops water from infiltrating the building, protecting the structure and its occupants.
Before doing damp proofing, you must contemplate climate conditions, building materials, and the source of moisture entry. This helps determine the most suitable damp-proofing method.
One common chemical injection dampproofing technique is injecting a liquid or gel material into the affected areas of the structure. This forms a waterproof barrier that hinders further moisture entry. The injected chemicals block water and make the structure stronger and more durable.
Pro Tip: Before attempting any DIY chemical injection damp proofing, study and comprehend the process for best results. Ask professionals for help if needed.
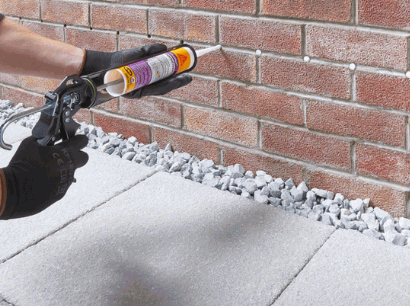
Preparing For Damp Proofing
To prepare for damp proofing with DIY chemical injection, gather the necessary tools and materials. Assess the affected areas and determine the required quantity of chemicals. This section equips you with the essential steps for a successful damp-proofing project.
Gather The Necessary Tools And Materials
Gathering the right tools & materials is key for damp proofing. Here’s a step-by-step guide to help you out:
- Assess the requirements. Understand what damp proofing needs.
- Research & seek advice. Get tips from pros or experts.
- Make a list. Keep track of all needed tools & materials.
- Shop smartly. Compare prices & prioritize quality.
- Double-check before starting. Avoid any hassle.
It’s essential to know that there may be specific items required, depending on the damp proofing method & severity of the problem. A study by The NIBS found dampness & moisture-related issues can affect buildings’ air quality.
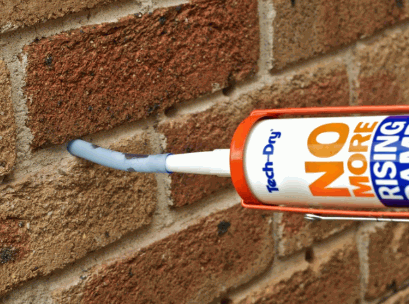
Assess The Affected Areas And Determine The Required Quantity Of Chemicals
Assessing affected areas and determining the quantity of required chemicals is vital for damp proofing prep. This approach allows a thorough evaluation of the damage and helps figure out the right amount of chemicals for the areas. Here are 5 steps to do it:
- Inspect: Carefully check areas with signs of dampness, like discolored walls or peeling paint. Look for cracks or leaks that may be causing the issue.
- Measure: Use a measuring tape for each affected area. It’ll help calculate the surface area needing treatment and estimate the quantity of chemicals.
- Identify dampness type: Different types of dampness require different chemicals. Figure out if it’s rising, condensation, or penetrating dampness to select the right chemical solution.
- Consult an expert: Seek advice from a damp proofing specialist who can assess the situation and give recommendations on the best course of action and chemicals.
- Calculate quantity: Based on measurements and consultation, calculate the exact quantity of chemicals needed for treatment. Follow manufacturer guidelines for dilution ratios for effective use.
Also, proper ventilation in affected areas can prevent further damage from moisture build-up. Regular inspection and maintenance can spot early signs of water damage before it’s too late.
Safety Precautions
To ensure safety while undertaking a DIY chemical injection damp-proofing project, it is crucial to take certain precautions. Understanding the potential hazards of chemicals and using personal protective equipment (PPE) play vital roles in safeguarding yourself.
Understanding The Potential Hazards Of Chemicals
Chemicals can be risky – so let’s break down the different hazards they pose.
Check out this table for an overview:
| Chemical Hazard | Description | Examples |
|---|---|---|
| Flammable | Ignites and burns easily | Acetone, gasoline |
| Toxic | Can be harmful or even deadly if inhaled or ingested | Lead, cyanide |
| Corrosive | Damages materials it touches | Sulfuric acid, strong alkalis |
| Irritant | Causes inflammation when in contact with skin or mucous membranes | Bleach, ammonia |
It’s also important to think about reactivity and environmental impact. Reactivity is how chemicals can react and cause danger when combined with other substances. Environmental impact considers the consequences of chemical release on ecosystems and nearby areas.
When you deal with chemicals, always wear PPE like gloves, goggles, and lab coats. Make sure your workspace has proper ventilation, too.
Pro Tip: Read Material Safety Data Sheets (MSDS) for each chemical. These sheets have info on handling, first aid, and emergency contacts in case of accidents or spills.
By being aware of the risks and taking proper precautions, we can keep ourselves and those around us safe. Stay informed and stay safe!
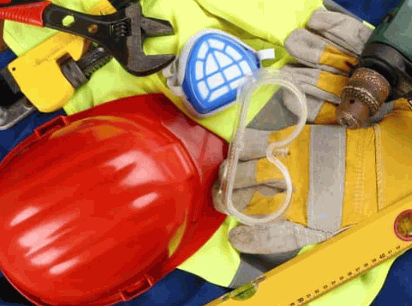
Using Personal Protective Equipment (PPE)
Using Personal Protective Equipment (PPE) is essential for individual safety in many settings. This article will explore the importance of PPE and its effectiveness.
Masks help protect against airborne particles and pathogens. Wear clothing that is not loose-fitting to avoid getting caught in machinery. Gloves provide a barrier between hazardous substances and skin. Safety goggles protect eyes from chemicals or debris. Harnesses and safety belts are essential for fall protection when working at heights.
There are other aspects to consider with PPE. Fit it properly and inspect it for damage or defects. Provide training on how to use and maintain it.
To ensure effectiveness:
- Select appropriate PPE for the task or environment.
- Clean and sanitize PPE regularly.
- Store PPE in a clean and dry area.
- Replace damaged or worn-out PPE.
- Educate workers on using PPE correctly.
Following these suggestions helps to reduce the risk of injury or illness in work environments. PPE is a vital defense and promotes safety and well-being.
Step-By-Step Instructions For DIY Chemical Injection Damp Proofing
To achieve successful DIY chemical injection damp proofing, follow these step-by-step instructions. Prepare the injection ports, mix the damp-proofing chemical solution, and inject the chemical into the affected areas. This systematic approach ensures a thorough and effective treatment, preventing moisture from seeping into your walls and causing potential damage.
Preparing The Injection Ports
For successful DIY chemical injection damp proofing, preparation of injection ports is key. Here’s a step-by-step guide to help you out:
- Assess the wall. Check inside and outside for cracks or cavities. Use a flashlight.
- Clean the area. Remove paint, dirt, and debris with a wire brush or scraper. Make sure it’s dry.
- Mark injection points. Use a pencil or marker to identify points.
- Install injection ports. Adhere them to marked points. Follow manufacturer instructions.
Note: Different walls may require specific methods. Consult experts or read product manuals.
DIY chemical injection damp proofing can be rewarding. It saves money and protects your home. So take precautions and follow proper procedures.
Mixing The Damp Proofing Chemical Solution
Gather all items needed to mix the damp-proofing chemical, such as the chemical, a clean bucket, measuring cups, and a stir stick. Measure the chemical according to the instructions. Put the measured chemical into the bucket. Then, gradually add water while stirring. Stir until all components are mixed and have a uniform consistency. Let it sit for a few minutes before application.
Always use protective gear like gloves and goggles. Mix only as much as you need to avoid waste. Different products may have different mixing instructions, so read and follow the manufacturer’s guidelines.
Mixing the damp-proofing chemical solution correctly is important for its effectiveness and longevity. Follow these steps and take precautions to reduce dampness and create a healthier environment.
Injecting The Chemical Into The Affected Areas
Before injecting the chemical, clean and dry the affected area. Get rid of any debris or loose materials that could disrupt the injection process. Follow the manufacturer’s guidelines to mix the right proportions of the chemical solution.
Drill holes into the areas where moisture is present. Insert the nozzle and inject the chemical solution with light pressure. Then, seal off the drilled holes with epoxy or mortar.
Be sure to read all the safety instructions provided by the product and relevant authorities. Proper ventilation is also important to secure safety and maintain air quality. A homeowner was able to use this chemical injection damp proofing and solved their basement issue. With the right tools and knowledge, you can do it too!
Aftercare And Maintenance
To ensure the long-lasting effectiveness of your DIY chemical injection damp proofing, aftercare and maintenance play vital roles. Cleaning and sealing the injection ports, as well as monitoring for any signs of moisture or dampness, are essential steps to guarantee the continued success of your damp-proofing solution.
Cleaning And Sealing The Injection Ports
- Gather the necessary items for cleaning: a mild detergent, warm water, a soft-bristle brush, and a clean cloth.
- Mix a mild detergent and warm water in a bucket or basin.
- Dip the brush into the soapy water. Gently scrub the injection ports to remove dirt and debris.
- Rinse the injection ports with clean water. Remove remaining soap residue.
- Dry the injection ports with a clean cloth. Make sure they are dry before sealing them.
Regularly clean and seal injection ports. Check for signs of damage or wear.
Neglecting proper cleaning has caused issues such as leaks and decreased performance.
But advancements have taught us the importance of this step.
Cleaning and sealing injection ports will protect them and improve system efficiency. So take the time to care for them regularly. You’ll gain performance and reliability.
Monitoring For Any Signs Of Moisture Or Dampness
- Inspect all moist areas, like bathrooms, basements, and kitchens.
- Spot visible water stains on walls/ceilings.
- Smell for musty odors which might hide moisture.
- Hygrometers can track humidity levels.
- Use moisture meters to detect moist spots behind walls/under flooring.
Address any signs of moisture quickly. This may include fixing leaks, better ventilation, or dehumidifiers in humid places. Maintenance prevents costly repairs and guards your home.
Conclusion
This article has explored DIY chemical injection damp proofing. Prep and diagnosis are necessary, as well as the chemicals and equipment. Safety precautions and risks are incredibly significant.
Manufacturers’ instructions must be followed and professional guidance may be necessary. DIY projects can be fulfilling, however, tackling chemical injection damp proofing without knowledge and experience can lead to costly errors. Seeking help from a professional specializing in damp-proofing solutions may be beneficial.
Now’s the time to create a safe and comfortable living environment! Take measures to address existing or potential damp issues. Prevention is better than cure when protecting your property from dampness. Act now and enjoy a healthier living space tomorrow!
