Contents
Damp-proofing wood walls is key to preventing moisture damage and keeping your space intact. It means taking steps to stop water from entering the walls and causing structural issues. Here, we look at DIY methods to damp-proof your wood walls.
Why is damp proofing so important? Wood is porous and easily absorbs moisture. This can lead to rot, mold growth, and other problems. By taking preventive action, you keep your wood walls safe.
A good way is to apply a waterproof sealant or paint. This makes a protective barrier on the wood, blocking water from entering. Choose a quality sealant or paint made of wood.
Also, install a vapor barrier behind the wood paneling or drywall. It serves as a physical barrier against moisture and stops it from reaching the wooden structure. Be sure to install the vapor barrier correctly.
Proper ventilation in the space helps prevent condensation and lower humidity levels. Install vents or fans in places like kitchens and bathrooms for better air circulation and drier wood walls.
Inspect your wood walls regularly for signs of dampness or water damage. Look out for discoloration, peeling paint, soft spots, or musty odors. If you find any, address them quickly to avoid more damage.
Understanding The Importance Of Damp Proofing Wood Walls
Wood walls are a beautiful design choice. But, they can be prone to dampness. To safeguard their structural integrity and prevent moisture-related issues like rot, mold, and mildew, damp proofing is essential. Wood absorbs and releases moisture depending on the humidity levels around it, which can cause warping, swelling, or decay.
To protect wood walls, specialized sealants or coatings can create an impermeable layer, keeping water out. Make sure to use high-quality products made for wood surfaces. Inspecting for signs of moisture penetration is also important.
Ventilation is vital too. Good airflow helps regulate humidity levels, reducing the risk of condensation. Fans or vents in bathrooms or kitchens can be beneficial.
Consult professionals for the right sealant and application techniques. Damp-proofing your wood walls will keep them looking beautiful and functioning well for years.
Preparing The Materials And Tools Needed For Damp Proofing
DIY projects are unique, so extra materials or tools might be needed. Consider a moisture meter to measure the wood wall’s moisture levels. Invest in high-quality waterproofing paint or sealant for wood surfaces that have great moisture resistance. Get brushes or rollers for an even application. Wear protective equipment like gloves, goggles, and a dust mask when working with chemicals. Proper preparation makes all the difference in successful DIY results!
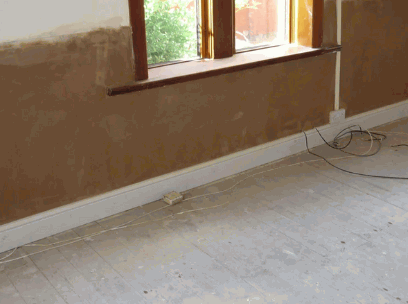
Inspecting The Wood Walls For Existing Damp Issues
Look out for any signs of water damage, like discoloration, mold, and peeling paint.
Also, feel the walls to see if they’re damp.
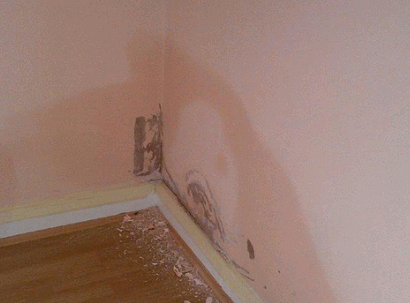
Check the baseboards and corners for water stains or soft spots.
Use a moisture meter to see if there’s hidden moisture in the wood.
Examine the exterior walls for any cracks that could let water in.
Besides these steps, pay attention to smaller signs of dampness. Condensation and lack of insulation can become bigger issues if left unchecked. It’s important to inspect your wood walls regularly to prevent costly repairs and health hazards. Act now to keep your house safe and sound!
Treating Any Existing Damp Problems
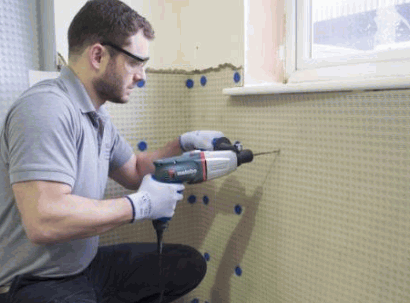
In order to address any existing damp issues, it is important to follow the necessary steps for effective treatment. Firstly, identifying the source of moisture is crucial, as it could be due to condensation, rising dampness, or penetrating dampness. Once the source is determined, appropriate measures can be taken to mitigate the problem. This may involve improving ventilation, sealing cracks and gaps, or applying damp-proof membranes. Additionally, it is important to ensure that any damaged or decayed wood is repaired or replaced to prevent further moisture infiltration. By taking these necessary steps, the underlying damp problems can be effectively treated, ensuring the durability and longevity of the wood walls.
Furthermore, it is essential to regularly monitor the moisture levels to prevent future recurrence of dampness. This can be done by using moisture meters or hygrometers to assess the moisture content in the walls. Maintaining proper ventilation and implementing preventive measures such as waterproofing treatments can also contribute to long-term damp prevention. By addressing the existing damp problems promptly and taking preventive measures, the wood walls can be safeguarded against moisture-related issues in the future.
Notably, in addition to the technical aspects of damp treatment, it is important to consider the potential impact on individuals residing in the affected area. Damp problems can lead to the growth of mold and mildew, which can be detrimental to respiratory health. Therefore, it is crucial to address these issues promptly to ensure the well-being of inhabitants.
Finding moisture or water damage on your wood walls is like discovering your ex’s number in your phone: it’s a sure sign of trouble.
Identifying Signs Of Moisture Or Water Damage
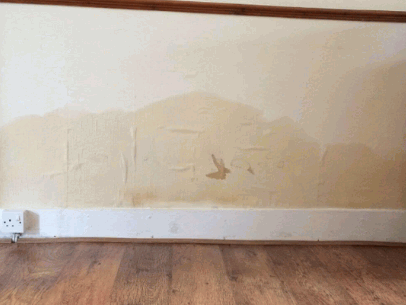
Moisture or water damage can be destructive. To stop it from getting worse, it’s important to recognize signs of damage quickly. Here are some key warnings:
- Water stains or discoloration on walls, ceilings, or floors
- Musty or damp smells in closed rooms
- Peeling or bubbling paint or wallpaper
- Visible mold growth
- Warped or swollen wood
- Deterioration of building materials like plaster, drywall, or cement
Neglecting moisture issues can lead to bigger problems and weaken the structure of your property. So it’s essential to tackle these signs fast.
It’s not only homes that are affected by wetness. Commercial properties and buildings are also at risk, like when a burst pipe causes lots of damage in a commercial building. It spread water through many floors, wrecking furniture and equipment. This serves as an important reminder of the importance of spotting and treating moisture or water damage without delay.
So keep an eye out for anything unusual that could show moisture issues and act quickly. Early detection is the key to avoiding expensive repairs and keeping your property in good condition.
Applying Appropriate Treatments Or Sealants
Locate the source of the dampness first. It could be a pipe leak, faulty guttering, or wall cracks. Solve these underlying problems to stop recurring dampness. Then, select an ideal treatment or sealant for the particular kind of dampness, such as condensation or rising dampness. Get expert advice or research thoroughly to make sure you use the most effective product. When applying the chosen treatment or sealant, follow the manufacturer’s instructions and clean the affected area first. For even coverage, use the correct tools and techniques.
Also, ample airflow is essential for preventing dampness in the long run. Open windows regularly or install ventilation systems. To further improve the outcome of the treatment, follow these steps: maintain areas prone to dampness (like bathrooms and basements); properly install insulation materials; and monitor humidity levels with dehumidifiers. Taking timely action and doing regular maintenance will keep your property in good condition and your living environment healthy.
Applying A Damp Proofing Solution To The Wood Walls
Wood walls can be prone to dampness, which can lead to damage and decay. To protect the wood and prevent moisture from seeping in, it is important to apply a damp-proofing solution. Here is a step-by-step guide to help you apply the solution effectively:
- Prepare the surface: Ensure that the wood walls are clean and dry before applying the damp-proofing solution. Remove any existing paint or sealant to allow the solution to penetrate the wood properly.
- Choose the right solution: There are different types of damp-proofing solutions available, including liquid membranes, epoxy resin, and silane/siloxane-based products. Select a solution that is specifically designed for treating wood surfaces.
- Apply the solution: Using a brush or roller, apply the damp-proofing solution evenly across the wood walls. Make sure to cover the entire surface, paying extra attention to any cracks, crevices, or joints where moisture can seep in.
- Allow for proper drying time: Give the solution enough time to dry and cure. Follow the manufacturer’s instructions for the specific product you are using, as drying times may vary.
- Apply a second coat (optional): Depending on the product you choose, it may be recommended to apply a second coat for added protection. This will enhance the effectiveness of the damp-proofing solution and provide an extra barrier against moisture.
- Monitor and maintain: Regularly monitor the wood walls to ensure that the damp-proofing solution is working effectively. If you notice any signs of dampness or moisture, reapply the solution as needed.
It is important to note that each wood wall may have unique characteristics and requirements, so it is always a good idea to consult with a professional or follow the manufacturer’s instructions for the best results.
Pro Tip: Before applying the damp proofing solution, consider testing a small inconspicuous area first to ensure compatibility and to determine the desired effect on the wood.
When it comes to choosing the right damp-proofing product, remember that moisture and walls are like exes at a wedding – they just don’t mix.
Choosing The Right Damp-Proofing Product
Compatibility: Check that the damp-proofing product you get is compatible with the type of wood used in your walls. Different woods have distinctive qualities, and using an unsuitable product can cause ineffectiveness or even damage the wood.
Application method: Think about how easy it is to apply when you pick a damp-proofing solution. Some products may need special gear or help from a professional. Others can be done by homeowners. Pick a way that works with your abilities and resources.
Effectiveness: Look for a product that gives good defense against dampness damage. Investigate the effectiveness of different damp-proofing solutions. Read customer reviews. And think of consulting with experts to figure out which option will protect your wood walls best.
Longevity: Think about how long the damp-proofing product will last. You want a solution that will work for a long time, so you don’t have to apply it or do maintenance too often.
Remember, you have to look over and maintain damp proofing regularly to make sure it stays good. By taking care of troubles quickly and having a proactive attitude, you can avoid issues down the line.
Preparing The Wood Walls For Application
Assess the condition- Inspect the wood walls for any damage or decay. Look for cracks, rot, or moisture. This will help you decide what needs to be done.
Clean and dry- Remove any dirt, dust, or debris using a vacuum or brush. Make sure the walls are completely dry.
Repair and seal- If there are any visible damages, fix them with a filler or sealant before applying the damp-proofing solution. Follow the manufacturer’s instructions on ventilation and safety.
A cautionary tale- A homeowner didn’t prepare their wood walls properly and moisture seeped through untreated areas. It caused damage and cost money to fix. Preparing the walls beforehand would have avoided all this.
Applying The Damp Proofing Solution According To The Manufacturer’s Instructions
- Clean the wood walls thoroughly to prepare the surface – removing any dirt, dust, or debris. To bond properly, it’s essential.
- Mix the damp proofing solution carefully, following the manufacturer’s instructions. This balances the chemical composition, maximizing effectiveness.
- Use a brush or roller to apply the solution evenly, paying attention to corners and edges.
- Allow sufficient time for it to dry completely before adding any finishes or exposing it to moisture.
- Manufacturer instructions regarding temperature conditions or protective measures should also be taken note of.
Ancient civilizations used natural substances, such as oils and resins from plants, to preserve wooden structures from humidity and water damage. This knowledge has evolved into modern-day solutions with advanced chemical formulas for increased protection. Such solutions ensure the longevity of our valuable wooden surfaces.
Explore: How To DIY Chemical Injection Damp Proofing
Allowing The Damp Proofing Solution To Dry And Cure
Ensure optimal results with the damp proofing solution by drying and curing it thoroughly. Follow these 5 steps for proper drying and curing:
- Using a brush or roller, evenly apply a thin layer of the solution to the wood surface.
- Let the solution air dry for 24 hours, and make sure the area is properly ventilated.
- Once dry, inspect the wood to be sure it’s evenly absorbed in the solution.
- If needed, apply a second coat with the same process.
- Give the second coat enough time to dry and cure before applying other treatments or finishes.
To ensure optimal drying and curing of the damp proofing solution:
- Keep temperature and humidity levels in the area during drying and curing.
- Avoid direct exposure to sunlight, which could cause uneven drying.
- Make sure the area has adequate ventilation; this helps speed up drying and prevent trapped moisture.
- Regularly check the drying progress by lightly touching the wood surface. If any area still feels wet or sticky, give it more time to dry.
With proper drying and curing time, your wood walls will be effectively protected against moisture, improving their longevity and durability.
Finishing Touches And Maintenance Tips
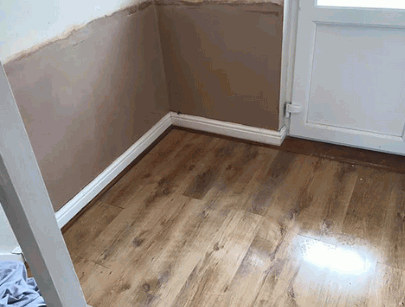
Dust & wipe wood walls regularly to get rid of dirt & grime. Use a soft cloth or microfiber duster to avoid scratches. Inspect walls for cracks & gaps. Seal them with wood filler or caulk to stop moisture from seeping in. Apply a protective finish like wax or varnish to make walls resistant to moisture, UV rays, & scratches.
Balance humidity levels. Use a dehumidifier in humid climates or rainy seasons. Hang curtains or blinds to protect walls from direct sunlight. Sunlight can fade color & cause warping. Check for mold & mildew. Remove with a mild bleach solution if present.
Follow these tips to keep wood walls in great condition!
Conclusion
We have discussed it – damp-proofing wood walls is essential. Follow the steps outlined in this article to protect them:
- Identify signs of dampness and use a damp-proof membrane on the external wall. This will prevent moisture from seeping in.
- Apply waterproof paint or sealant too. Choose a high-quality product designed for wood surfaces.
- Maintain proper ventilation to reduce condensation and humidity. Utilize dehumidifiers and open windows regularly.
- Inspect and repair any cracks or gaps in your wood walls. Seal them with filler or caulking materials. This will further enhance damp-proofing effectiveness.
Investing in these techniques will safeguard your wood walls. Preserve their aesthetic appeal and structural integrity. Minimize potential damage caused by moisture infiltration. Ensure a longer lifespan for your wooden surfaces.
